
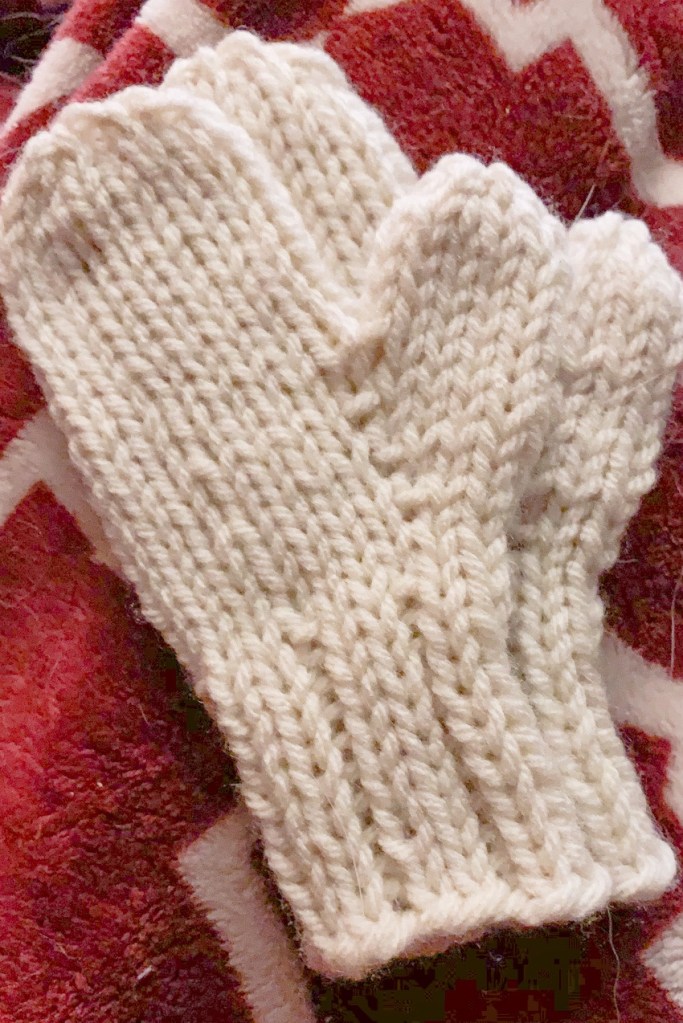
Mittens have to be one of my favorite small projects to do. They are one of those quickly made-up things to do over a weekend. You can create a whole bunch in a short amount of time, and are great for gift giving!
As we move closer into the colder weather, all these knit and crochet projects are becoming more useful than fun to make, and so this week I figured we could get started on keeping our very important hands warm!
Materials Needed:
- Any colored worsted weight yarn. (I used Lion Brand’s Vanna White yarn)
- Size 6 (4mm) double pointed needles
- Size 8 (5mm) double pointed needles
- Stitch holder
- Scissors
- Tapestry Needle
There’s a few steps to making mittens, so I’ll write out each one here, there is also going to be a video showing you each step.
- Key:
- K – Knit
- P – Purl
- M – Make stitch
- K2tog – Knit two together
- SSK – Slip, slip, knit
Directions for adult size mitten as follows. (Toddler / Child / XL Adult) size numbers are also available.
- Using the size 6 double pointed needle, cast on a total of 36 stitches (12 on each needle)
- (18 / 30) total stitches for smaller sizes
- 42 total for the large adult
- Ensuring all the stitches aren’t twisted, knit in the round by knitting into the first stitch made.
- First, we are going to create the ribbed cuff. To do that: *K2, P1* repeat across all three needles until cuff is 2” tall.
- Switch to your size 8 double pointed needles for the rest of the mitten.
- Knit across all stitches for 2 rows
- For the LEFT mitten:
- K10, M1, K1 (K4… / K8… / K14)
- K1, M1, K10 (…K4 / …K8 / …K14)
- Knit all
- Knit all for the next row
- We’re going to keep increasing the number of stitches every other row until there are 19 (9 / 15 / 23) stitches on two of the needles, and 12 (6 / 10 / 14) on the third. Every row in between will be a Knit All row
- Once you have all the extra stitches:
- K12 (K5 / K9 / K15) then move the remaining stitches (on Needle 1) to the stitch holder
- Move the first 7 (4 / 6 / 13) stitches onto the stitch holder for the second needle, then K12 (K5 / K9 / K15)
- Knit all on the third needle
- Continue to knit all across all three needles for about 16 rows (depending on the size mitten you need)
- Knit (12 / 14 /19) rows
- To decrease:
- Move 3 (1 / 2 / 4) stitches from the third needle onto the second
- Move 6 (2 / 3 / ) stitches from the second needle onto the first
- The first needle should have 18 (8 / 14 / 22) stitches while the remaining two have 9 (4 / 6 / 10)
- Needle 1: K2tog, K14, SSK (K2tog, K2, SSK / K2tog, K10. SSK)
- Needles 2&3: K2tog, K5, SSK (K2tog, SSK / K2tog, K2, SSK)
- Knit across all stitches
- Keep decreasing this way until 3 stitches remain on the second and third needles
- Knit all
- K2tog across all (you will have to move some stitches around)
- Using your tapestry needle, cut the yarn from the skein and weave the tail into all the remaining stitches. Cinch shut and insert the needle into the center of the hole. (You can leave the tail inside the mitten for now)
- To create the thumb:
- Move 7 (4 / 6 / 13) stitches from the stitch holder onto a needle, then the remaining 7 (4 / 6 / 13) onto a second needle
- Pick up 4 (2 / 4 / 6) stitches from the mitten itself, close to the thumb opening
- Knit across all stitches
- Move 2 stitches from the first needle to the third, and 2 from the second onto the third (skip step for smaller sizes)
- Continue knitting across all until the thumb is high enough to cover an actual thumb
- K2tog across all
- K2tog across all
- Cut yarn again, and using the tapestry needle, weave in the tail to the remaining stitches, cinching it all shut again.
- Flip whole mitten inside out and start weaving in our ends from all parts.
- The RIGHT mitten will follow the same steps, with differences being on which needle you do things on.
- To decrease:
- Move 3 (1 / 2 / 4) stitches from the first needle onto the second
- Move 6 (2 / 3 / ) stitches from the second needle onto the third
- The third needle should have 18 (8 / 14 / 22) stitches while the remaining two have 9 (4 / 6 / 10)
- Needle 1&2: K2tog, K5, SSK (K2tog, SSK / K2tog, K2, SSK)
- Needles 3: K2tog, K14, SSK (K2tog, K2, SSK / K2tog, K10. SSK)
- Knit across all stitches
- Keep decreasing this way until 3 stitches remain on the first and second needles
- Knit all
- K2tog across all (you will have to move some stitches around)
- To decrease:
Follow along with the video as I show you how to go through all the steps:

Leave a reply to yarnbytheglass Cancel reply