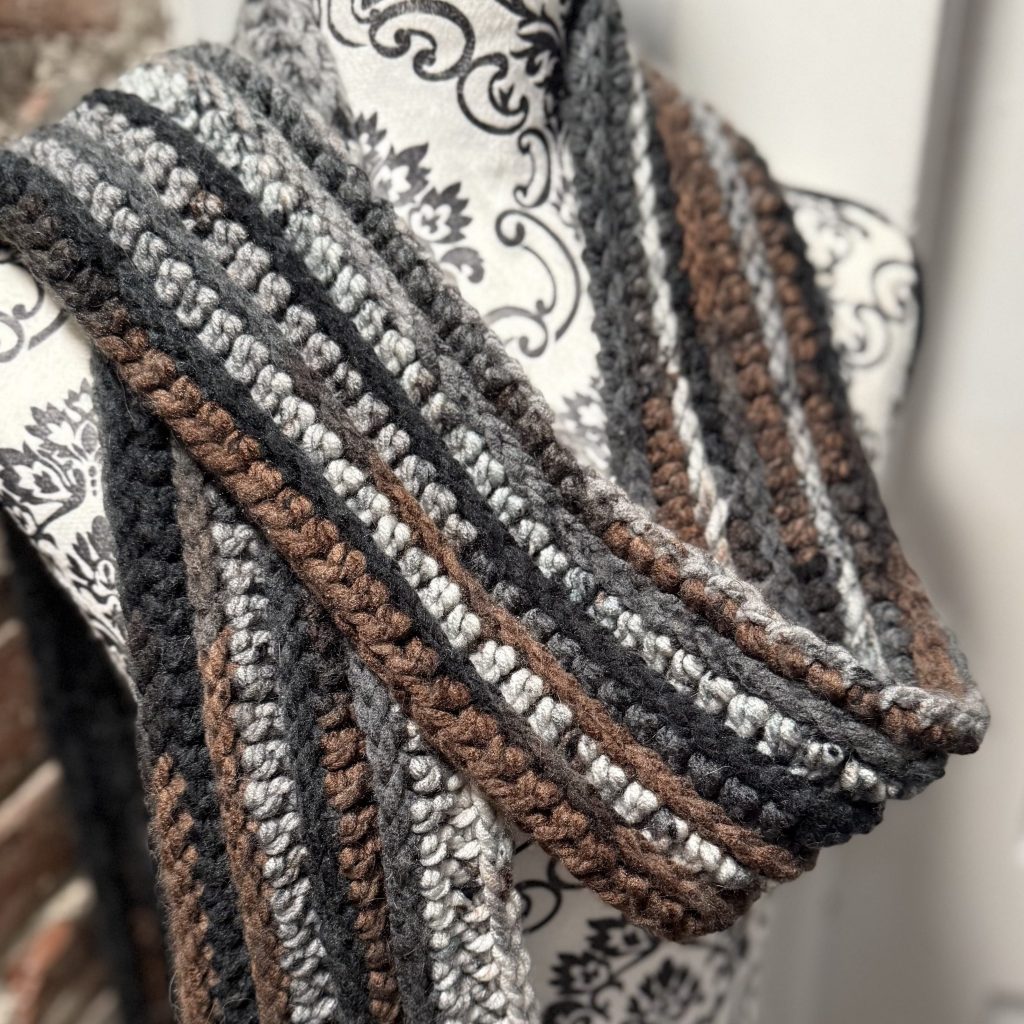
The Long Waves Scarf is a scarf that worked length-wise, meaning the scarf’s total length is set by the amount of chains we start with, and then the rows will build the width. This pattern can be beginner friendly because it’s one stitch (after the foundation row), but the stitch itself is a little tricky at first.
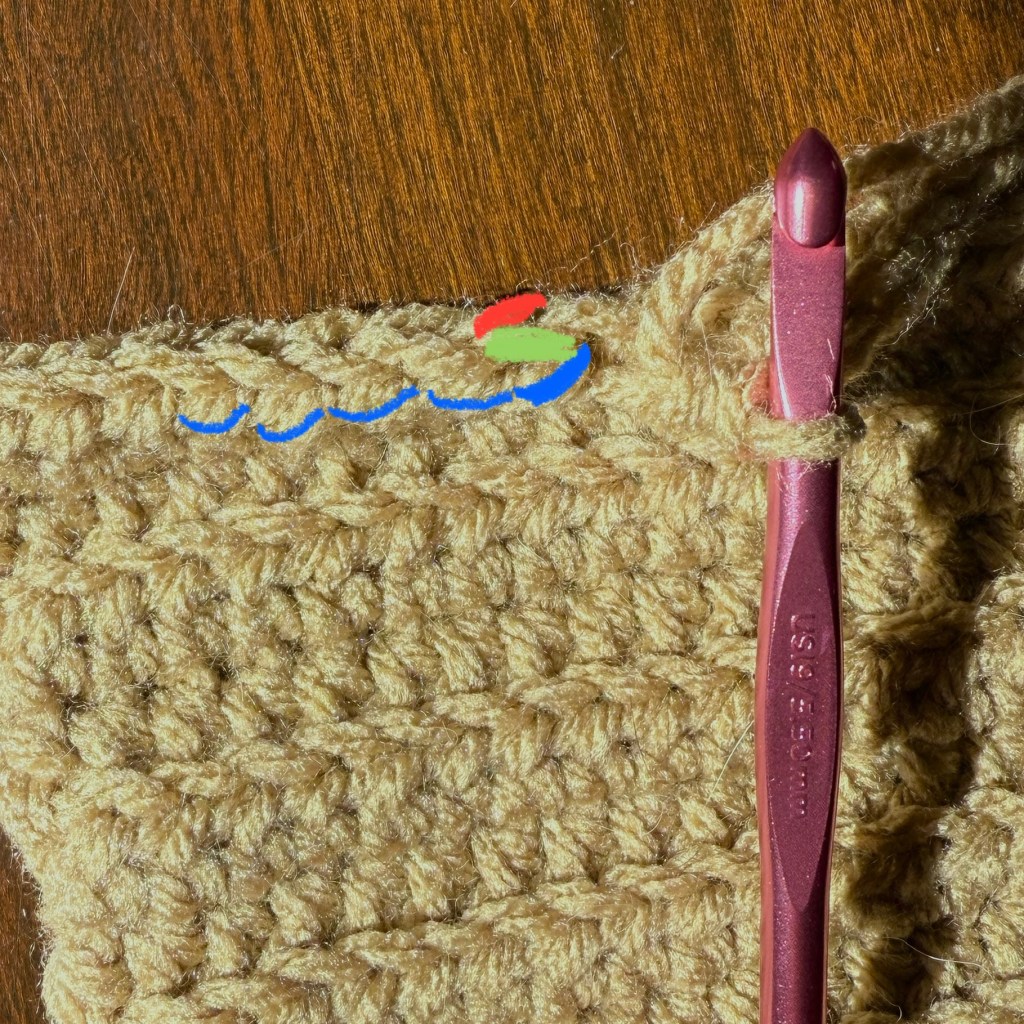
If you are familiar with half double crochets (HDC), the foundation row is all HDCs, and the remaining rows are HDCs, but the hook is inserted into the third loop. When creating the half double crochet, you start by yarning over, resulting in the typical two loops you would insert your hook into (the “V” shape you see when looking at it from the top). These two loops are also referred to as the “front” and “back” loops.
In the photo below you can see the three loops mentioned. The Red line is the “back” loop, the Green line is the “front” loop, and under those is another little loop, the Blue line called the 3rd loop. This blue line represents the loop we’ll be inserting our hook into. This loop is a little tricky to recognize as you get started, but because it’s the only stitch we’ll be using to create this scarf, you’ll start to see it more easily.
Below, I’ll outline what we’ll need to to start this project, and then the written pattern. To watch me go through these steps, you can follow along with me at the end in my video.
Materials needed:
- Chunky weight yarn (#5) – at least 118 yards
- Crochet hook I9 (5.5 mm)
- Scissors
- Tapestry needle
Directions:
- Chain (ch) 218
- In the second chain from the hook, do a half double crochet (HDC). Do a HDC in each chain to the end of the row, then ch 1 and turn work.
- In the very first stitch do a HDC into the 3rd loop. Repeat HDC in the 3rd loop for the rest of the row, ending with a normal HDC, ch 1 .
- Repeat step 3 for 8 rows (or more if you want a thicker scarf, less rows for a thinner scarf).
- Cut off any remaining yarn, and loop tail end through the last open loop to create a small knot. Weave in the remaining tail for a seamless look and you’re done!
Follow along below for the step-by-step video version:

Leave a comment