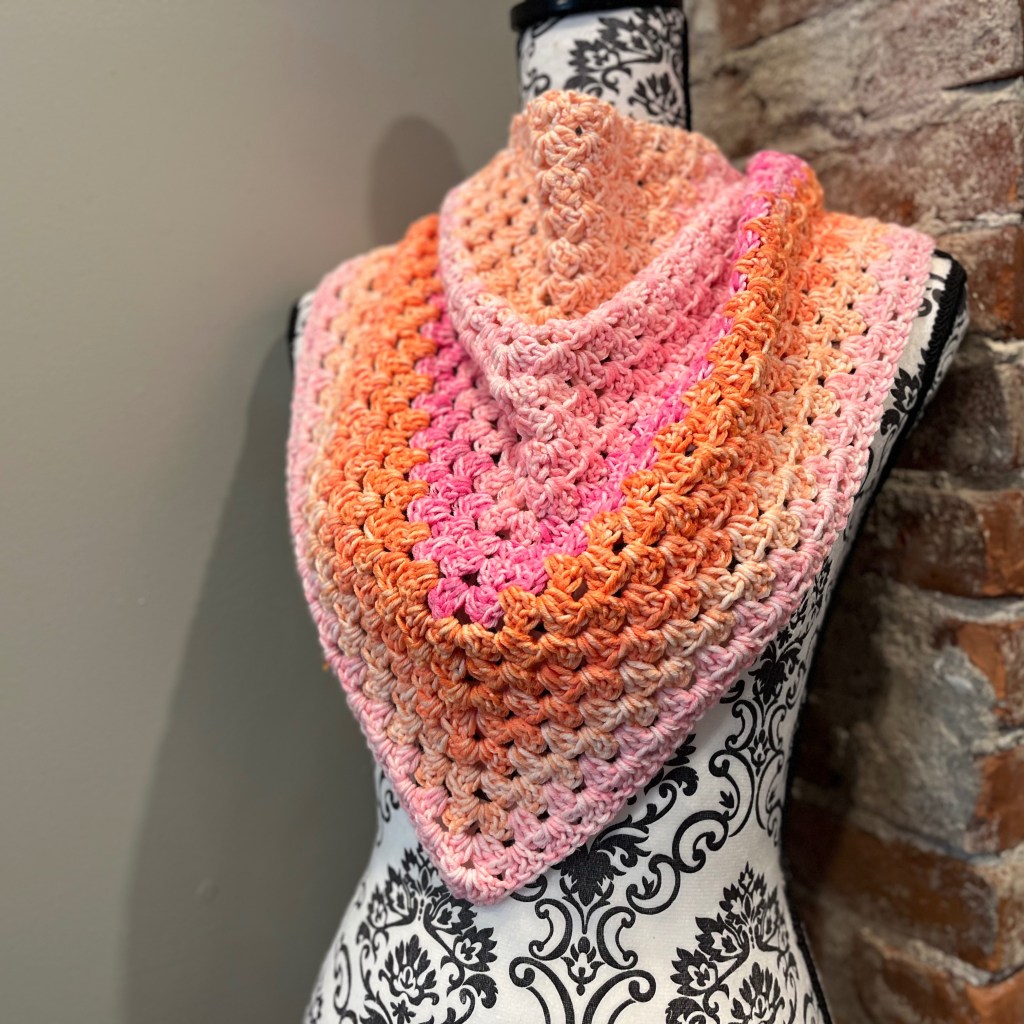
I love being outdoors in the summer when the heat from the day cools down, and the stars start to come out. These nights can get chilly though, and having something warm to put on. The Summer Nights Triangle Scarf is a great scarf for these occasions because it keeps you warm without overheating you, even as the hot summer starts to turn to autumn.
I am loving these self striping yarns! Because the triangle scarf is a pattern where the rows increase with every turn, the self striping pattern really comes out without looking too purposeful. The uneven-ness of the striping has a nice effect, especially when only one simple stitch is being used.
For this pattern we’ll be using the Granny Square stitching to get this textured pattern. The directions for the pattern are written out below, but I wanted to point out a few basics in case you are new to the Granny Square. The granny square is made up of groups of double crochets, with another group being crocheted into the space between the two from the previous row. For the purposes of this scarf, the triangle shape is created by adding these groups evenly on each row, at the beginning and end of the rows, and at the peak of the triangle. There is also a video tutorial showing how to create this scarf at the end of the page. So let’s get into what we’ll need to make this scarf!
Materials:
- 1 ball of worsted weight yarn
- Crochet hook I (5.5mm)
- Scissors
- Tapestry needle
Directions:
- We’re starting off with a magic circle, so chain 4, then do a slip stitch into the first chain to create the circle. Chain 3 (this will count as your first double crochet post).
- Create two double crochets (DC) into the center of the chain circle, chain (ch) 2, then 3 DC into the center of the same circle. Ch 3
- Into the bottom of the chain 3 stitch, create 2 DC, then 3 DC into the ch 2 space from last row, ch 2, and 3 DC into the same 2 ch space, then 3 DC between the two last DC posts from previous row. Ch 3
- Here, we are adding to our row at the height of our scarf (where the triangle point is), as well as the two ends of our row.
- Create 2 DC into the ch 3 stitch, 3 DC into the space between the last group of DC’s, 3 DC into ch 2 space, ch 2, 3 DC into same space, then 3 DC into space between the two DC groups below, ending with 3 DC in between the last two posts from the previous row.
- Repeat the last row for the remainder of the scarf, remembering that the number of 3 DC groups on each side will increase by 1 each row.
You can also follow these steps in my video below:

Leave a comment