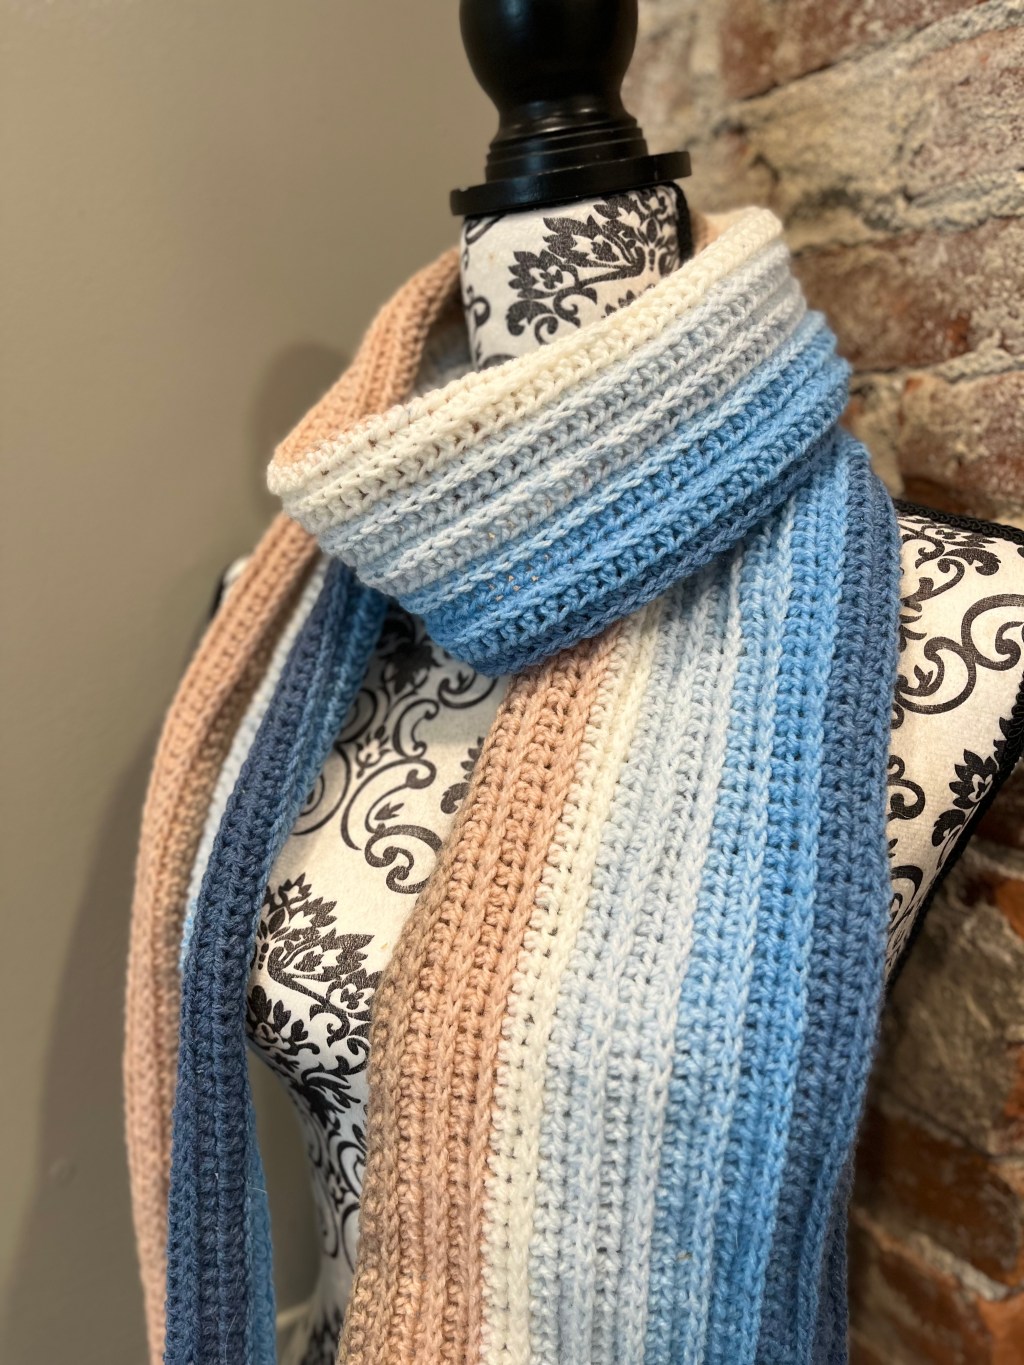
Hello Summer! Despite the warmer weather I am still thinking of new crochet scarves I can make. So when I found this cute skein from Lion Brand I knew I had to create something. The colors made me think immediately of being at the beach, and knowing how windy it can get some days, a scarf isn’t the craziest thing to have handy.
This pattern uses half double crochet stitches in a couple different ways to create this ribbed look for the scarf. The ribbing only appears on one side of the scarf so the number of rows needed doesn’t have to increase. This is also a one-skein project so getting the most yarn out of the skein was a goal here. To get this beachy appearance, I used the Lion Brand Mandala “Wishing Well” color which features the sandy browns, watery blues and the white you see on the crests of the waves.
Let’s take a look at what we’ll need to make this scarf:
- 1 skein of 3 DK weight yarn (see above for exact color)
- Crochet hook “H” (5.0mm)
- Scissors
- Tapestry needle
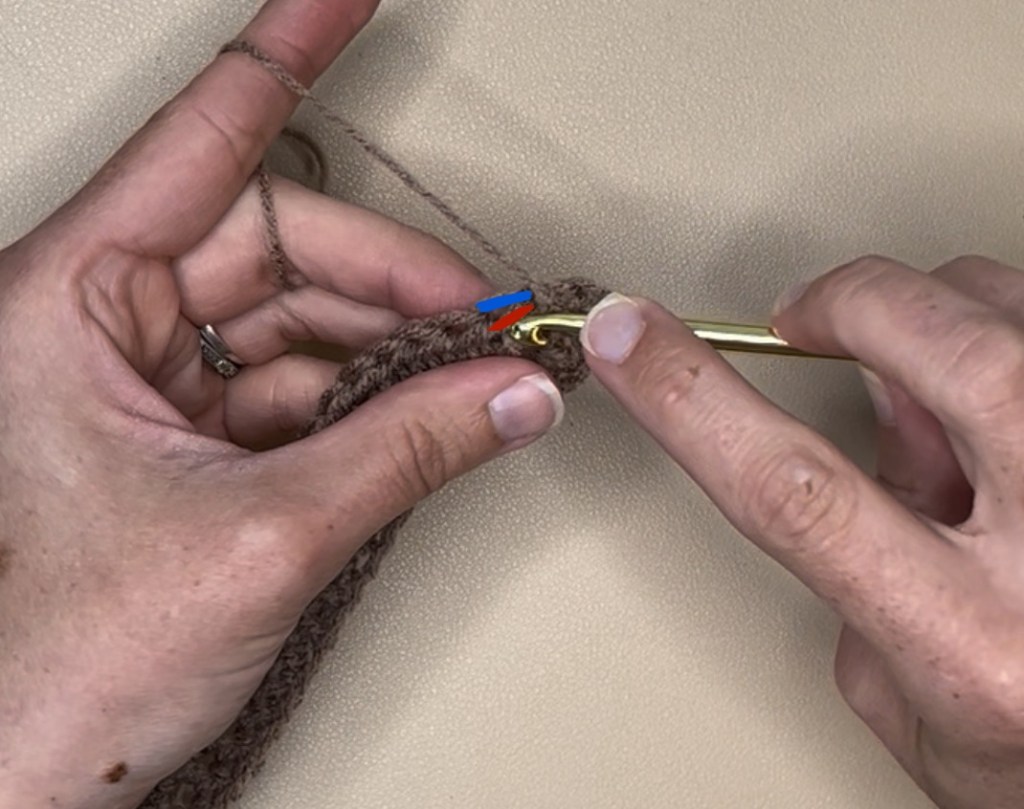
To make the scarf you’ll need to know how to do a half double crochet. To start, you’ll wrap the yarn around the hook once, then insert the hook into the stitch, grab the yarn and pull it through the stitch. You should have three loops on your hook. Grab the yarn again and pull it through all three loops, and you have a half double crochet!
To do the half double crochet into the loop that forms under the typical 1st and 2nd loop that make the “V” shape when you look at the stitch from the top down. When looking at the stitch from the side you’ll see another loop which is the 3rd loop. In the image below the blue line the side of the 2nd loop, and the red line where the crochet hook is pointing to is the 3rd loop to look for.
Directions:
- Chain (ch) 274
- Going into the third ch from the hook, do a half double crochet (HDC). Continue doing HDC into each chain across the row. Ch 2 and turn your work.
- HDC across entire row again, ch 1.
- HDC into the 3rd loop across the entire row. Ch 2
- Repeat steps 2 & 3 until you have a small amount of yarn left, ending on step 3.
To follow along with me, you can click on the video below as I take you through each step.

Leave a comment